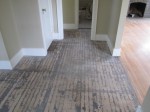
Adventures in Refinishing Hardwood Floors – We’ve Been There

This summer, Artur and I bought our first home.  We had been looking for over a year and dreaming for more than that.

We knew that any house we bought would need some remodeling. With our budget, Artur’s skills, and what we know about real estate, buying a fixer was the best investment for us.  Plus, we aren’t turn-key kind of people.  We wanted a fixer. In July, we got the keys to our dream fixer.

Refinishing the hardwood floors was at the top of our new-house projects’ list.  Most of the house already had a mix of red and white oak flooring.  It was in amazing shape considering it hadn’t been refinished in at least 15 years. The living room and the kitchen were the only rooms that didn’t have hardwoods.  The living room had some very, shall we say, “dated” green carpet and the kitchen had a mix of hardwood and linoleum.

Kitchen before:


Living room before:

IMG_1316


To bring in a more cohesive look to our home, we decided to pull up the carpet and linoleum, install a new mix of red and white oak to match the existing floors in the rest of the house, stain all areas a richer color and finish them with a Swedish Finish.

Here’s the living room mid-carpet removal. (You wouldn’t believe the amount of dirt we found under this carpet despite having been taken care of over the decades, further reinforcing our love of hardwoods.)

IMG_1341


Here’s the kitchen mid-linoleum removal. (Sorry for the blurry picture.)

IMG_1344

After the carpet and linoleum were gone Artur started installing the new wood we had ordered.

NOTE:  Before installing new wood flooring it is very important to store the flooring in your home or installation space for at least a week prior to installing. Wood is very sensitive to moisture and heat and needs to acclimate to the new climate, lowering the risk of warping or bucking after installation.

To begin the installation process, Artur first lays down a moisture barrier.  Then, before nailing down the boards, he sorts them out in a way that looks balanced and nice, both in color variation and board length.  See below.

IMG_1450

Here are photos of the kitchen and living room after the floors have been installed but before staining and finishing.

IMG_1517


IMG_1482


The stain we choose was Provincial from Daly’s.  We love how the stain pulls out the character in the wood, ties in the red and white oak, as well as adding a richness to the floors without being too dark.

Here are the floors after being sanded, covered with a layer of filler (always necessary), sanded again, stained and finished with three coats of Swedish Finish.

Living Room – After

photo 1 photo 2


Kitchen – After

photo photo 2


A side-by-side view of the before and after of the kitchen floors:

photo 2


A side-by-side of the before and after of the living room floors:

photo 1photo 1


We love how the floors turned out!  Although we have worked with many many clients as they navigate decisions about their hardwood floors in their own homes, we hadn’t ever gone through that process personally.  After this experience, we now feel that much more knowledgeable and prepared to help our clients as they make decisions regarding their hardwood floors.

Coming soon, more personal experiences from the Project Planeta Remodel and why you should always do your thorough research before hiring a contractor.

Before and After in Maple Leaf

Here are some photos of a job we did earlier in the winter in and old craftsman home in the Maple Leaf neighborhood of Seattle.

We ripped up the old carpet in the living room, the tiles in the entryway and some flooring that had been glued down in the kitchen and dining room.  We then installed and finished new Red Oak Select hardwoods in the living room, dining room, kitchen and entryway.  The results are beautiful.  Having one type of flooring through the entire first floor made the house look so much bigger and feel more cohesive.  Check it out!


8th ave ne dining:kitchen before

Kitchen/Dining Room Before


8th ave NE kitchen

Kitchen After


Before of Kitchen Area

Kitchen Corner Before


8th Ave NE kitchen - after

Kitchen After

8th ave ne dining room - after

Dining Room After

8th ave ne living room before

Living Room and Entryway Before

Living Room Before

Living Room Before

8th Ave NE living, dining - after

Living Room and Dining Room After

image[5]

Entryway Before

8th Ave NE dining room  - after

Living Room and Entryway After

Patterns in Hardwoods

I’ve been having a lot of fun on Pinterest lately exploring some of the amazing wood floors in various spaces across the world.  I finally created my own board dedicated just to wood floors that I find interesting or inspiring.  There is some stunning craftsmanship out there.  I especially love some of the herringbone or chevron patterns I’ve come across and of course anything with inlay work is always exciting.

Here are some photos of some beautiful inlay work we did for some clients in Snoqualmie a couple of years ago.  These floors were such a treat to do.  Like most craftsmen, Artur has an amazing attention to detail and takes great pride in the completed product.

After - Newly Installed Maple With Custom Mahogany Inlay - Snoqualmie

Newly Installed And Finished Maple With Custom Mahogany Inlay

Detail of Maple with Mahogany Feature Strip Installed Before Final Finish

Detail of Maple with Mahogany Feature Strip Installed Before Final Finish

Detail of Maple with Mahogany Feature Strip Installed Before Final Finish

Detail of Maple with Mahogany Feature Strip Installed Before Final Finish

A Tale of Two Species

Artur and I are huge fans of older homes. They ooze character, craftsmanship and are the historical storytellers of our neighborhoods.

We recently worked on a 1909 gem in the Ravenna neighborhood of Seattle. Our clients had us pull up the old carpet and refinish the fantastic hardwoods beneath. We were excited to find that both the living room and dining room floors were composed of two different species of wood. Both had a center square of Douglas Fir with an Oak border. This is a common hardwood flooring layout for homes built during this period in the Pacific Northwest.

Because Douglas Fir was so plentiful in our part of the world, it was more economical to install the majority of the square footage with this wood leaving only the border for the pricier Oak planks.

Wall to wall carpeting didn’t exist in 1909. Instead, people used area rugs, often Persian or Oriental, to decorate their living spaces. These rugs were perfect for covering up the more inexpensive center square of Douglas Fir, leaving only the Oak border showing. So clever and functional, if not a bit deceptive!

See the before and stunning after photos below.

20130716_084728

BEFORE

20130720_091927

AFTER


20130716_084640

BEFORE

20130720_091846

AFTER


20130716_084719

BEFORE

20130720_091832

AFTER

Wide Board and Sleek Stain in Kirkland Condo

Gallery

This gallery contains 10 photos.

This winter we had the exciting opportunity to help transform a lovely condo in Kirkland into a beautiful modern living space.  The new owners wanted to rip out all of the carpet and American Cherry hardwoods on all three levels, install new 5″ … Continue reading

Patching The Pet Pee Stains

Sometimes when a client calls us to come over and look at some floors that they want refinished we find some unexpected surprises hidden on the ares of the floors that have been coverd by carpet or rugs. Often these surprises come in the form of unpleasant pet pee stains. Unfortunately, no amount of sanding can eliminate these stains. In comes the art of patching. Except in extreme cases, we generally do not have to replace the entire floor and can fix the stained areas by patching the damaged areas. Artur skillfully pulls up the damaged boards and installs and blends in new boards. See the photos below for an example of a floor stained with pet pee and how Artur resolved the problem with patching.

202

205

208

214

Award for Super Service!

As we have said many times, customer service is of the utmost importance to Artur and me.  We  get great personal and professional satisfaction from impressing our clients from the first phone call they make to us to the final product.  Our committment to an outstanding experience for our clients was recently recognized by Angie’s List.  They awarded us the 2012 Super Service Award.  We are thrilled and honored to have received this award.  See the official press release below.

             Planeta Works Earns Esteemed 2012 Angie’s List Super Service Award

 Award reflects company’s consistently high level of customer service

 Planeta Works has earned the service industry-coveted 2012 Angie’s List Super Service Award, an honor awarded annually to approximately 5 percent of all the companies rated on Angie’s List, the nation’s leading provider of consumer reviews on local service companies.

“It’s a select group of companies rated on Angie’s List that can claim the exemplary customer service record of being a Super Service Award winner,” said Angie’s List Founder Angie Hicks. “Our standards for the Super Service Award are quite high. The fact that Planeta Works earned this recognition speaks volumes about its dedication providing great service to its customers.”

Angie’s List Super Service Award 2012 winners have met strict eligibility requirements, including earning a minimum number of reports, an excellent rating from their customers and abiding by Angie’s List operational guidelines.

Service company ratings are updated daily on Angie’s List. Companies are graded on an A through F scale in areas ranging from price to professionalism to punctuality. Members can find the 2012 Super Service Award logo next to company names in search results on AngiesList.com.

 Angie’s List helps consumers have happy transactions with local service professionals in more than 550 categories of service, ranging from home improvement to health care. More than 1.5 million paid households use Angie’s List to gain unlimited access to local ratings, exclusive discounts, the Angie’s List magazine, and the Angie’s List complaint resolution service.

Customer Service

The top priority for Planeta Works is customer satisfaction.  We want our customers to be satisfied with our work, our service and our prices.  We are very proud to share the following review a recent client posted which reflects the importance we put on happy clients.  Thank you Jenn for  publishing this review on Yelp.

http://www.yelp.com/biz/planeta-works-shoreline

Filler – An Unknown but Essential Step in Refinishing Hardwood Floors Properly

Many people who haven’t ever had their hardwood floors refinished don’t realize that there are many steps that go into properly refinishing the floors. To someone who isn’t familiar with the process, it would seem that the floors would just need one sanding and a coat of finish. Any good hardwood flooring contractor will tell you that to properly refinish your floors and achieve a lasting result, there are many steps involved. Besides multiple sandings, buffing and coats of finish there is also the very important step of applying a filler to your floors.

The purpose of the filler is to fill in any small holes or cracks in your hardwoods creating a more smooth and cohesive feel and look. Without the filler every nail hole and/or small space between the wood boards would be more visible.

A lot of Seattle area homes have the original hardwood flooring that was installed when the home was built.  For many of these homes this means a top nail floor.  Top nail is exactly as it sounds.  The boards are installed by nailing them down from the top.  Each board generally has around four nails to secure it to the subfloor.  When refinishing top nail hardwoods, Artur starts by resetting each nail into the floor.  Applying filler to these floors is especially important and useful as it covers and smooths out the irregular surface.

See below for photos of Artur applying the filler.

Uncovering Hardwoods From Other Types of Flooring

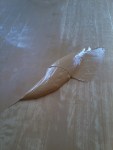
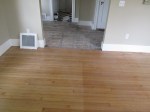
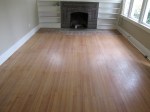
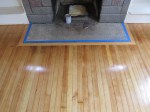
We recently refinished the hardwood floors in a home located in the Wedgewood neighborhood of Seattle. This home, which has been a rental for some years, is getting some serious TLC before being put on the market to sell. Some of the house had exposed hardwood and some of the hardwoods were covered up by vinyl flooring in the dining room and an overdose of tile around the fireplace. Once the vinyl and extra tiles were removed we were able to come in and successfully refinish the floors. One would never know that these floors were once covered in vinyl, tile and glue. We think the results are pretty awesome and will add tremendous value to this home. The floors were a combo of Fir and Hemlock and we used a Swedish Finish on them. See below for before and after shots.